 English

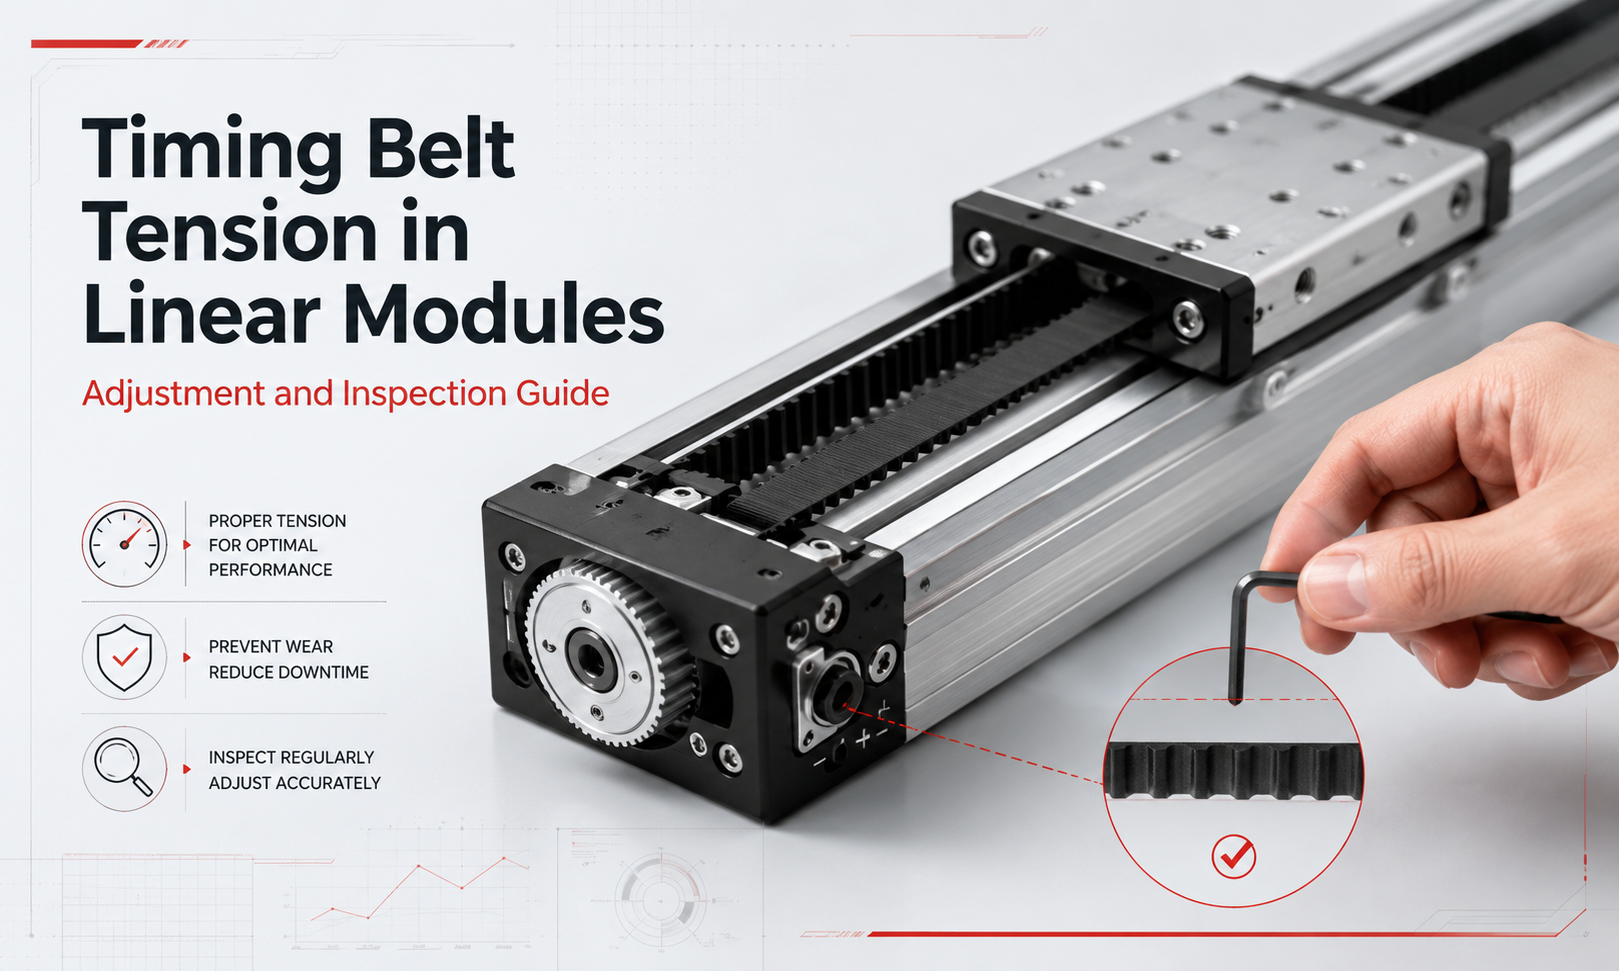
Correcttiming belt linear module tensionis essential for maintaining stable positioning, smooth movement, low operating noise and reliable power transmission. The timing belt must be tight enough to engage correctly with the drive pulley and prevent tooth jumping, but it must not be excessively tightened.
If the timing belt is too loose, thelinear modulemay experience belt slippage, positioning errors, vibration, delayed response and abnormal noise. If the belt is too tight, excessive radial force may be applied to the pulley bearings, motor shaft and supporting components, resulting in increased friction, premature wear and higher motor load.
This guide explains correct belt tension, common tension measurement methods, the effects of low and excessive tension, the recommended adjustment procedure and practical inspection intervals for timing belt driven linear modules.
Why Timing Belt Tension Is Important
Atiming belt linear moduleconverts motor rotation into linear motion through a toothed belt and pulley system. The belt is connected to the carriage, allowing the carriage to move along the linear guide when the drive pulley rotates.
Unlike a conventional flat belt, a timing belt transmits motion through positive engagement between the belt teeth and pulley grooves. This toothed engagement helps prevent ordinary friction-based slipping. However, the belt still requires suitable pretension to keep the teeth fully engaged under acceleration, deceleration and changing load conditions.
Correct timing belt pretension helps the linear module achieve:
- Stable transmission between the motor and carriage
- Consistent positioning and repeatability
- Fast response during acceleration and deceleration
- Reduced belt vibration and resonance
- Lower operating noise
- Reliable pulley tooth engagement
- Longer belt and bearing service life
- Reduced risk of unexpected downtime
Belt tension should therefore be treated as an important mechanical setting rather than a simple assembly detail.
What Is Correct Timing Belt Tension?
Correct belt tension is the amount of pretension required to keep the timing belt stable and properly engaged with the pulleys throughout the operating cycle.
The ideal tension depends on several factors, including:
- Timing belt material and internal tension cords
- Belt width and tooth profile
- Distance between the drive and idler pulleys
- Pulley diameter and number of engaged teeth
- Carriage load
- Maximum speed
- Acceleration and deceleration
- Installation orientation
- Operating temperature
- Duty cycle and reciprocating frequency
There is no universal tension value suitable for every timing belt linear module. The correct value should be determined from the module manufacturer's technical documentation, assembly specification or belt supplier's recommended tension range.
A properly tensioned belt should remain engaged with the pulley during rapid movement without producing excessive resistance, bearing noise or motor load.
Timing Belt Pretension and Working Load
Timing belt pretension and working load are related but different concepts.
Pretensionis the initial force applied to the belt during installation or adjustment. It keeps the belt tight before the linear module begins moving.
Working tensionis the force generated in the belt while the carriage is accelerating, moving, decelerating or supporting an external load.
During operation, one side of the belt becomes the tight side while the opposite side becomes the slack side. Sufficient pretension prevents the slack side from becoming excessively loose and losing proper tooth engagement.
However, increasing pretension does not continuously improve performance. Once sufficient tooth engagement and motion stability have been achieved, additional tension mainly increases bearing load, shaft stress and mechanical friction.
Symptoms of Low Timing Belt Tension
Low timing belt tension is one of the most common causes of unstable operation in belt driven linear modules. The symptoms may initially appear only during high acceleration or sudden direction changes.
Positioning Error
A loose belt can stretch, oscillate or temporarily lose full engagement during acceleration and deceleration. This may cause the actual carriage position to differ from the commanded position.
Positioning errors caused by low tension are often more noticeable during frequent reciprocating motion or when the carriage changes direction rapidly.
Reduced Repeatability
If the belt does not respond consistently to each motor movement, the carriage may stop at slightly different positions during repeated cycles. This reduces repeatability even when the motor and controller are operating normally.
Tooth Jumping
Under high load or rapid acceleration, insufficient belt tension may allow the belt teeth to climb out of the pulley grooves. This condition is commonly called tooth jumping or tooth skipping.
Tooth jumping can produce a sudden positioning offset and may trigger a motor alarm, encoder deviation alarm or process failure.
Abnormal Vibration
A loose belt may vibrate between the drive pulley and idler pulley. This vibration can be transferred to the carriage, guide rail, module housing and machine frame.
The vibration may become more severe at certain speeds because of resonance.
Flapping or Impact Noise
When the belt is excessively loose, it may contact the module housing, protective cover or internal components. This can produce flapping, knocking or intermittent impact sounds.
Delayed Motion Response
Low belt tension may create a small delay between motor rotation and carriage movement. This effect can resemble mechanical backlash, especially during direction reversal.
Uneven Belt Tracking
A loose timing belt may not remain centered on the pulleys. It may move toward one side, contact a pulley flange or rub against nearby components.
Premature Tooth Wear
Repeated partial engagement and tooth jumping can damage the belt tooth surface. The belt may show worn tooth edges, damaged fabric covering or localized deformation.
Effects of Excessive Timing Belt Tension
Excessive tension can be as harmful as insufficient tension. A timing belt should never be tightened simply until it feels extremely rigid.
Increased Bearing Load
High belt pretension applies continuous radial force to the drive pulley shaft and idler pulley shaft. This increases the load on bearings even when the module is not moving.
Excessive bearing load can result in higher operating temperature, increased noise and shortened bearing life.
Higher Motor Load
An over-tensioned belt increases mechanical resistance. The motor may require more torque to move the carriage, especially during startup and acceleration.
This can lead to increased motor current, reduced acceleration capability or overload alarms.
Premature Belt Elongation
Although timing belts are reinforced with internal tension cords, continuous excessive force can cause permanent elongation or internal cord damage.
An over-tensioned belt may therefore lose its correct tension sooner rather than remaining stable for longer.
Pulley and Shaft Wear
Excessive radial force can accelerate wear on pulley bores, keys, clamping connections, motor shafts and support shafts.
Reduced Mechanical Efficiency
Higher bearing friction and belt deformation increase energy loss. This reduces the overall efficiency of the linear motion system.
Abnormal High-Frequency Noise
An excessively tight timing belt may produce a continuous humming, whining or high-frequency sound, particularly at high travel speeds.
Heat Generation
Excessive belt tension can cause the pulley bearings, motor shaft area and belt contact surfaces to operate at higher temperatures.
Damage to the Motor Shaft
If a motor is directly connected to the drive pulley, excessive belt tension may apply a radial load greater than the motor shaft or motor bearing is designed to support.
This risk is especially important for smaller servo motors and stepper motors.
How to Measure Timing Belt Tension
Timing belt tension can be inspected using several methods. The most suitable method depends on the module structure, available access, required accuracy and maintenance equipment.
Frequency Measurement Method
The frequency method is one of the most accurate and repeatable ways to measure timing belt tension.
A section of the belt is lightly struck or plucked so that it vibrates. A belt tension meter measures the natural vibration frequency. The measured frequency is then compared with the value specified by the module or belt manufacturer.
The relationship between belt tension and vibration frequency depends on:
- Free belt span length
- Belt mass per unit length
- Belt construction
- Measured vibration frequency
For reliable results, the carriage should be placed in the specified inspection position so that the measured free span length remains consistent.
Deflection Force Method
The deflection method measures the force required to push the belt a specified distance at the center of a free belt span.
The basic procedure is:
- Identify the correct belt span for measurement.
- Measure the free span length.
- Apply force at the midpoint of the span.
- Deflect the belt by the specified distance.
- Measure the required force using a tension gauge.
- Compare the result with the recommended range.
This method can provide useful results when the module design allows direct access to the belt.
Dedicated Belt Tension Gauge
Mechanical or electronic tension gauges may be used to measure belt tension directly. The selected gauge must be suitable for the belt width, expected tension range and available measurement space.
Carriage Resistance Check
After tension adjustment, technicians may move the carriage manually when the motor is safely disconnected or released.
The carriage should move smoothly without obvious binding, excessive resistance or sudden tight spots. This check does not replace a measured tension value, but it can reveal excessive tension, pulley misalignment or guide problems.
Visual and Manual Inspection
Visual inspection can identify severe looseness, belt sagging, edge rubbing, damaged teeth or uneven tracking. Light finger pressure may also help compare belt tension with a known correctly adjusted module.
However, manual judgment is subjective and should not be used as the only method for precision equipment.
Preparation Before Adjusting Belt Tension
Before adjusting the timing belt, the linear module and surrounding machine should be placed in a safe condition.
- Stop the equipment and disconnect the main power supply.
- Follow the applicable lockout and tagout procedure.
- Release stored pneumatic, hydraulic or gravitational energy.
- Support vertical or suspended loads before loosening mechanical components.
- Move the carriage to the recommended maintenance position.
- Remove the protective cover only after confirming that the system cannot move unexpectedly.
- Clean visible dust, particles and belt debris from the module.
- Inspect the belt, pulleys, bearings and fasteners before changing the tension.
A belt tension adjustment should not be used to hide damage caused by worn teeth, damaged tension cords, misaligned pulleys or defective bearings.
How to Adjust Timing Belt Linear Module Tension
The exact adjustment mechanism varies by module design. Some modules use an adjustable idler pulley, while others use a movable end block, tensioning screw, wedge mechanism or carriage-side belt clamp.
The following procedure describes a general adjustment method.
Step 1: Record the Existing Condition
Before loosening any component, record the current position of the tensioning mechanism. Mark the original screw position or measure the exposed thread length.
This provides a reference if the adjustment needs to be reversed.
Step 2: Inspect the Timing Belt
Check the belt for:
- Cracked or missing teeth
- Worn tooth fabric
- Frayed belt edges
- Exposed tension cords
- Oil or chemical contamination
- Permanent deformation
- Uneven surface wear
A damaged belt should normally be replaced rather than retensioned.
Step 3: Inspect the Pulleys
Examine the drive and idler pulleys for tooth wear, contamination, damaged flanges, loose locking components and shaft movement.
Confirm that both pulleys are properly aligned. Incorrect pulley alignment can cause uneven belt tracking and edge wear even when the tension is correct.
Step 4: Loosen the Locking Fasteners
Loosen only the fasteners required to release the tensioning mechanism. Do not fully remove structural screws unless the module manufacturer's procedure requires it.
The tensioner should remain controlled during adjustment.
Step 5: Adjust the Tension Gradually
Turn the tensioning screw or move the adjustable end block in small increments. Avoid making a large adjustment at one time.
If the mechanism uses two adjustment screws, adjust both sides evenly to keep the pulley shaft parallel to the module body.
Step 6: Measure the Belt Tension
Use the specified frequency, deflection or tension gauge method. Repeat the measurement several times to confirm consistency.
Measurements should be taken at the same carriage position and belt span each time.
Step 7: Check Pulley Alignment and Belt Tracking
Confirm that the belt is centered correctly and does not contact the pulley flange excessively.
Rotate the pulley manually through several complete revolutions when the equipment design allows it. Observe whether the belt moves toward one side.
Step 8: Tighten the Locking Fasteners
Once the correct tension is reached, tighten the locking fasteners evenly using the specified tightening torque.
Locking the mechanism may slightly change the belt tension, so another measurement should be taken after tightening.
Step 9: Move the Carriage Manually
Move the carriage slowly through the full available stroke. Check for:
- Uniform movement resistance
- Interference between the belt and housing
- Abnormal pulley noise
- Tight spots near the stroke ends
- Uneven belt tracking
Step 10: Perform a Low-Speed Test
Restore power and operate the module at low speed without maximum load. Observe belt movement, motor current, vibration, noise and carriage stability.
Step 11: Increase Speed Gradually
Increase speed and acceleration in stages. Do not immediately operate the module at maximum speed after adjustment.
Confirm that the belt remains stable during direction reversal and emergency deceleration.
Step 12: Verify Positioning Performance
Run repeated positioning cycles and check whether the carriage returns consistently to the commanded positions.
If the system uses an encoder, review following error, motor current and alarm history where possible.
Common Belt Tension Adjustment Mistakes
Adjusting by Feel Only
Technicians may tighten the belt until it feels firm. This method can easily result in excessive tension because belt stiffness varies by width, material and construction.
Increasing Tension to Correct Every Positioning Problem
Positioning errors may also be caused by loose pulley connections, motor coupling problems, guide wear, encoder errors, incorrect controller settings or excessive load.
Belt tension should be verified rather than assumed to be the cause.
Ignoring Pulley Alignment
A correctly tensioned belt can still wear rapidly if the pulleys are not parallel or if the drive pulley is installed incorrectly.
Adjusting Only One Side
On tensioning mechanisms with two adjustment points, changing only one side may tilt the idler pulley and cause belt tracking problems.
Retensioning a Damaged Belt
A belt with damaged teeth, exposed cords or severe edge wear cannot be restored through tension adjustment.
Failing to Recheck After Tightening
The final tension may change when the end block or tensioner fasteners are tightened. Always remeasure after locking the mechanism.
Applying Full Load Immediately
After adjustment, the module should first be tested at low speed and reduced load. Full-speed testing should only begin after stable operation has been confirmed.
How Installation Orientation Affects Belt Tension
Installation orientation changes the forces acting on the timing belt linear module.
Horizontal Installation
In horizontal applications, the belt mainly overcomes carriage inertia, friction and external process forces.
Belt tension should be sufficient for the maximum acceleration and load without introducing unnecessary bearing force.
Vertical Installation
In vertical applications, the belt must also support the gravitational load. The tension difference between the two sides of the belt can become greater.
Vertical axes should include suitable braking, counterbalance or anti-fall protection. Belt tension alone must not be treated as a safety mechanism.
Side-Mounted Installation
Side mounting may change the direction of load applied to the guide system and carriage. Although this does not always directly change the required belt pretension, it can influence belt tracking if the module frame is twisted during installation.
Gantry and Dual-Axis Systems
In synchronized gantry systems, inconsistent belt tension between parallel axes may cause skewing, uneven motor load and synchronization errors.
Both axes should be inspected using the same method and under comparable conditions.
Temperature and Environmental Effects
Operating temperature can influence belt dimensions, material stiffness and tension. A module adjusted in a cold workshop may behave differently after reaching normal operating temperature.
Environmental factors that may affect belt tension include:
- High or fluctuating temperature
- Continuous high-speed operation
- Dust and abrasive particles
- Oil mist and coolant
- Chemical vapor
- High humidity
- Cleanroom cleaning agents
- Outdoor exposure
The belt material must be compatible with the operating environment. Contaminated or chemically degraded belts may lose mechanical properties even when the measured tension appears acceptable.
Recommended Timing Belt Tension Inspection Intervals
The appropriate inspection interval depends on operating speed, acceleration, load, duty cycle, environment and machine criticality.
A practical inspection schedule may include:
- During initial installation:Measure and record belt tension before commissioning.
- After initial running-in:Recheck tension after the first period of operation because the belt and mechanical connections may settle.
- Daily or before each shift:Listen for new noise and observe unusual vibration or positioning alarms.
- Monthly:Perform a visual inspection for belt wear, edge damage, contamination and tracking problems.
- Every three to six months:Measure the belt tension and inspect pulley fasteners, bearings and tensioning components.
- After a collision or overload:Inspect the belt immediately.
- After belt or pulley replacement:Measure the initial tension and recheck it after running-in.
- After unexplained positioning errors:Include belt tension in the troubleshooting process.
High-speed, high-acceleration or continuous-duty equipment may require more frequent inspection. Low-duty equipment in a clean environment may allow longer intervals.
The manufacturer's maintenance schedule should always take priority over a general recommendation.
When Should the Timing Belt Be Replaced?
Tension adjustment cannot correct every belt problem. The timing belt should be considered for replacement when any of the following conditions are found:
- Missing, cracked or severely worn teeth
- Exposed or damaged tension cords
- Severe edge fraying
- Permanent elongation that cannot be corrected within the adjustment range
- Repeated tooth jumping despite correct adjustment
- Chemical swelling, hardening or surface deterioration
- Localized deformation
- Oil contamination that cannot be safely removed
- Unstable tension after repeated adjustment
- Damage caused by pulley misalignment or foreign objects
When replacing the belt, the pulleys and bearings should also be inspected. Installing a new belt on a damaged pulley may lead to rapid repeat failure.
Troubleshooting Belt Tension Problems
| Symptom | Possible Tension-Related Cause | Recommended Check |
|---|---|---|
| Positioning error during acceleration | Belt tension too low or tooth jumping | Measure tension and inspect belt teeth |
| Repeated error after direction reversal | Loose belt or loose pulley connection | Check tension, pulley locking and carriage connection |
| Continuous high-frequency noise | Belt tension may be excessive | Measure tension and inspect pulley bearings |
| Belt flapping inside the housing | Insufficient tension | Inspect free span and adjustment mechanism |
| Motor overload alarm | Excessive tension or mechanical binding | Check motor current, belt tension and guide resistance |
| Belt moves toward one pulley flange | Pulley misalignment or uneven adjustment | Check pulley parallelism and tensioner position |
| Premature bearing failure | Excessive belt pretension | Measure tension and inspect radial loading |
| Rapid belt edge wear | Tracking problem rather than tension alone | Inspect pulley alignment, flanges and module straightness |
| Vibration at a specific speed | Loose belt or resonance | Check tension, support rigidity and motion profile |
Preventive Maintenance Recommendations
Reliable timing belt operation depends on more than tension adjustment. A complete preventive maintenance program should include:
- Keeping the belt and pulley area clean
- Checking pulley locking screws and shaft connections
- Inspecting belt teeth and edges regularly
- Monitoring motor current and operating temperature
- Checking carriage movement and guide lubrication
- Verifying module mounting and frame rigidity
- Avoiding overload and excessive acceleration
- Recording tension measurements and adjustment history
- Using the specified replacement belt type and width
- Investigating new noise or vibration before serious damage develops
Maintenance records are particularly useful for identifying gradual belt elongation, repeated tension loss or differences between similar machines.
Frequently Asked Questions
How tight should a timing belt linear module be?
The belt should be tensioned according to the module manufacturer's specified frequency, force or pretension range. It should not be adjusted only by hand feel. The correct tension must prevent tooth jumping without overloading the pulley bearings or motor shaft.
Can a loose timing belt cause positioning errors?
Yes. A loose belt can produce delayed response, vibration, tooth jumping and inconsistent movement during acceleration or direction reversal. These effects can cause positioning and repeatability errors.
Can excessive belt tension damage the motor?
Yes. Excessive tension can apply high radial force to the motor shaft and bearings. It also increases friction and motor current, which may lead to overheating or overload alarms.
How can timing belt tension be measured?
Common methods include vibration frequency measurement, belt deflection force measurement and dedicated mechanical or electronic tension gauges. The result should be compared with the manufacturer's specification.
Should a new timing belt be rechecked after installation?
Yes. The belt, clamps and tensioning components may settle during the initial operating period. The tension should be measured again after running-in.
Does increasing belt tension improve positioning accuracy?
Only when the original tension is insufficient. Once the belt has enough pretension to maintain stable engagement, further tightening usually does not improve accuracy and may increase wear and motor load.
Why does the belt keep becoming loose?
Repeated tension loss may be caused by loose locking fasteners, damaged belt tension cords, worn belt clamps, movement of the tensioning block, pulley shaft problems or operation beyond the module's load capacity.
Can belt tension be checked without removing the module?
In many designs, the belt can be inspected after removing a protective cover. However, access and measurement procedures vary. The manufacturer's maintenance instructions should be followed.
Conclusion
Correcttiming belt linear module tensionis necessary for accurate positioning, stable acceleration, low vibration and long component life. Insufficient tension can cause tooth jumping, delayed response, noise and positioning errors, while excessive tension can overload bearings, increase motor current and accelerate belt wear.
The most reliable approach is to inspect the entire belt transmission system, measure tension using a repeatable method and make adjustments gradually according to the manufacturer's specification. Belt tension should also be rechecked after initial running-in, maintenance, collisions, overload events or unexplained positioning changes.
By combining regular tension inspection with pulley alignment checks, belt condition monitoring and proper operating limits, timing belt driven linear modules can maintain reliable performance throughout long-term industrial automation operation.